Showing posts with label Regimen. Show all posts

PREVIEW: Dickinson's Witch Hazel Skin Care Line

There are certain brands that just ring nostalgic...brands like Ivory Soap, Vaseline, Palmers, Johnson & Johnson, Palmolive, and Jergens are just a few.  I can't remember a time as a child (a loooong time ago), that most of these products weren't in my house.  I recently saw a commercial advertising a new product line from one of those brands from long ago...Dickinson's Witch Hazel! Some brands, for me, just based on my experiences with that brand, I will jump at the opportunity to try new products from that brand.  Dickinson's Witch Hazel was what I used as my toner for years...I don't know why I stopped using it. Probably the marketing of other brands that enticed me.  
Anyway, I saw this commercial and saw that Dickinson's has introduced several new products in their skin care line: Gentle Skin Cleanser Lotion, Pore Perfecting Toner, Foaming Facial Wash, Oil Controlling Astringent, Oil Controlling Towelettes.


As someone with combination-oily skin, I am always on the hunt for products that will help control my oil levels. No one wants to walk around looking like an oil slick throughout the day.  So while on a recent trip to Walgreens, I spotted the new Dickinson's Witch Hazel product line and I picked up the Foaming Facial Wash.


Dickinson's Promise:

This foaming facial wash delivers clean without complication. It uses the power of witch hazel to gently remove dirt and impurities from even the most sensitive, reactive complexions while controlling excess oil daily. Its non-drying, non-irritating formula contains mild yet effective ingredients that maintain balance even when used with most treatment regimens.


  • All skin types
  • 100% all natural, No harsh chemicals
  • No soaps, fragrances, oil, dyes, parabens, sulfates or reasons to worry  
  • Dissolves excess oil
  • Clears pores
  • Rinses Clean
  • Maintain balance
  • No animal testing

  • The next product I picked up was the Oil Controlling Astringent.  
    Dickinson's Promise:


    This oil controlling astringent maintains a shine-free complexion throughout the day. Its 100% natural witch hazel formula, infused with refreshing witch hazel flower extract, gently removes excess oil, dirt and bacteria helping to prevent blemishes without dryness or irritation - for beautifully clear and healthy looking skin everyday.


  • 100% all natural,  No harsh chemicals
  • No fragrances, oils, dyes parabens, sulfates or reasons to worry
  • Fights blemishes
  • Cleans deep
  • Will not overdry
  • Eliminates shine
  • Dermatologist recommended
  • Maintain balance
  • No animal testing


  • My initial experience:


    As this Dickinson's Foaming Facial Cleanser does not claim to remove make-up, I first used a facial wipe (Aveeno Ultra Calming) to remove my make-up.  I then used the  Dickinson's Foaming Facial Cleanser with my Clarisonic. I did not experience a ton of foam but it did lather.  The cleanser did not leave my face feeling tight or drawn.  I intentionally waited after rinsing to see if I experienced that tightness. We are all familiar with that too tight feeling we have gotten from some cleanser.  I followed up with the Oil Control Astringent.  It wasn't harsh nor did it sting.  I followed up with my eye cream and moisturizer and was set for the evening.  So after my first use of these two products, I am happy with the result and I will be adding them to my skin care regimen and hope for the best.  I still need to see how the "oil controlling" works.


    Have you tried any of the Dickinson's Witch Hazel facial products, if so which ones?  Also, what are some of your favorite beauty/cosmetic brands from your childhood?

    Grace, Peace, & Blessings.


    * FTC: These products were bought with my own monies. These are my honest opinions. I am not employed by nor was I paid by and of these companies. This is not a sponsored post.

    Post Response: How long does my manicure last?

    Last fall Kelly, of Vampy Varnish did a post called “Nail Polish Wear & Why I Never Discuss It”. Also, the nail polish industry has recently been bombarded with gel polishes which promise to give you two weeks worth of wear from your manicure.  I have often been puzzled why so many people can’t get their manicure to last more than a couple days without chipping.  If I choose to not change my polish, I can easily get 2 weeks out of a manicure with no chipping; of course, there will be growth and tipwear, but I very seldom have issues with chipping.  So I decided to do a response post to Kelly's original post. I followed my normal manicure regimen and took periodic update pictures. My goal was twofold, one, as a tutorial and two, to see for myself how long my manicure and tolerance would last. (I normally get bored with a polish after a few days, LOL!)

    So for starters, products used were as follows:
    • Treatment: OPI Nail Envy Original (1 coat), I rotate with Nail Life Nail Revitilizer also, but they both give me the same results
    • Basecoat: American Beauty Gelous (1 coat)
    • Basecoat: Nail Life Gripper Adhesive Basecoat (1 coat)
    • Nail Polish: Misa Sinning Out Of Control (2   coats), & China Glaze Liquid Crystal (2 coats) on accent nails. I had to decide on a color(s) that I could tolerate for a   long period of time. *I pretty much get the same wear, regardless of the polish brand I use-drugstore or department store.
    • Top Coat: Seche Vite Fast Drying Top Coat (1 coat)
    I realize that that is a drawnout process, but For Me, It Works…

    Regimen:
    • Remove Cuticles (if needed)
    • File, shape and buff nails (if needed)
    • Oil Nails and Cuticle with my cuticle mix
    • Exfoliate hands (optional)
    • Moisturize with favorite hand cream
    • Wipe down nail beds with alcohol to remove all traces of oil
    • Proceed to polish my nails with each of the products mentioned above. Yes, all of them. Also, being certain to "wrap my tips" with each product.
    • Moisturize my nails & cuticles at least once daily.
    Side notes:
    Kelly stated that some of the contributing factors to her polish life were a lot of hand washing and using the keyboard. She also clarified her definition of a perfect manicure as it looking “exactly like it did the second you applied it. That means NO tip wear, not a single chip or crack and no noticeable nail growth around the cuticle area.”

    My definition of an “Acceptable manicure” is as follows: No chipping or peeling; no noticeable nail or cuticle growth and minimal tip wear. My life is filled with a lot of hand washing, dish washing without gloves, and like most people, live by texting and a keyboard.

    Starting photos (3/23/2012)

    Update photo: (3/27/2012) - 1 week into manicure. There is minor tip wear, and some growth at the cuticle. But still acceptable.

    Ending photos: (4/2/2012) - 10 days into my manicure. Although there was no chipping, I couldn't tolerate the growth at my cuticles and had grown tired of the color.  The manicure had also lost some of its shine. But still no chipping.
    No Chipping, but much growth.
    Texting & Keyboards = Tipwear.
    Another view of tipwear.
    So as you can see from the picture timeline, I was able to go several days with no chipping. So for me, I see no reason to invest in the latest gel nail products.  In addition to the enjoyment I get from doing my own nails, I also get substantial "wearage" (my word, LOL!) from the products and process I currently use.  So if your level of tolerance is similar to mine, you may want to try the products & process I use and hopefully, you will get similar results.  Should you have any questions, please post them and I will get back to you as soon as possible.


    Remember, treat your nails as jewels not tools. 

    Grace , Peace, and Blessings. 


    Grace, Peace, & Blessings.


    * FTC: These products were bought with my own monies. These are my honest opinions. I am not employed by nor was I paid by this company. 

    Forced to start over...

    Good Day All! Happy May 1st! This year is moving fast. Sorry I have not posted recently but I have been dealing with a move so I have been out of pocket for a while. Anyway, as a result of the move I broke 5 nails (4 on the right and 1 on the left). UGH!!! Sad, but a fact of reality. So I decided to cut them all off and start over, documenting my growth progress here on my blog. Although I like my nails long, I must admit that I love the freedom of nubby-land. So here is the photo documentation of the starting point-what I like to call the "Moving Massacre".  As you can see, when I say “start over”, I mean start over.  My nails haven’t been this short in about 6-7 months.  But I will be following my regimen and using my cuticle oil, to get them back in shape and to a length more pleasing to me. Obviously, these photos are before I do my first mani; it is just showing the cut; so please excuse the cuticles and jaged edges.  I will post again later, showing the first mani.  Anyway, more later.  Grace and Peace.
    Right Hand Starting Point
    Left Hand Starting Point

    My Cuticle Oil and its inception...

    In response to a follower’s question about my cuticle oil, I decided to go into detail.  A little over 13 months ago I set out on a Healthy Hair Journey.  While on my journey, I did much research on natural and essential oils and their benefits to hair.  As it turned out, just as they benefit my hair, Natural and Essential Oils also provide great benefits for both my skin and nails.  So because I absolutely despise dry skin, especially my hands and knowing the benefits of moisturizing my hands and cuticles, I decided to develop my own cuticle oil. 

    Based on my hair research findings, I knew that my cuticle oil would be based on Jojoba Oil (pronounced “Ho-Ho-Ba”) and Vitamin E to nourish and hydrate my cuticles and nails.  Jojoba Oil has antimicrobial properties, which means it actually discourages the growth of some bacterial and fungal microbes that attack the skin. In addition, the chemical composition of Jojoba Oil closely resembles that of the skin’s natural sebum, so it is easily absorbed and rarely causes allergic reactions, even in the most sensitive individuals.   In addition, Jojoba oil contains many important nutrients, such as vitamin E, and B complex vitamins.   Jojoba oil helps to nourish the skin and helps to prevent hang nails and also strengthens the nails    Jojoba Oil also helps to avoid chipping and breaking, while it nourishes your cuticles and help maintain them.

    So as I set out to develop my cuticle oil, I decided it would also include the following:

    • Vitamin E Oil:     When applied topically, vitamin E oil penetrates the deeper skin layers and moisturizes it.  It can also be used for treating dry and cracked cuticles.
    • Sweet Almond OiL:Contains several essential vitamins such as vitamin A, B1, B2, B6 and E, which makes it very useful for treating skin conditions.  All these vitamins rejuvenate the skin. (NOTE: Not to be used by those with nut allergies.)
    • Lavender & Rosemary Oils:   Both help to stimulate blood circulation in the nailbed and encourages nail growth.
    • Lemon Oil:        Has anti-septic, astringent and bacteria fighting properties.  You need a healthy nailbed to encourage nail growth.
    • Lemongrass Oil:      Helps as a strengthener for brittle nails. New discovery: (yet to add to my mixture)
    There are a myriad of benefits to natural and essential oils.  Please take some time and research the many different oils.  http://www.buzzle.com/articles/essential-oils/

    My current cuticle oil is a mixture of Jojoba Oil (3 parts), Sweet Almond Oil (1 part), Vitamin E (1 part), and essential oils (lemon, lavender, & rosemary)-approximately 3-5 drops per (Adjust based on your preference-too much can be overpowering).

    One thing I learned on my Healthy Hair Journey is to try new things.  I am not “married” to any one process.  During my research for my cuticle oil, I came across many recipes for hand and nail treatments that each sound promising.  I may try anyone of them in the future.  I included one of the website I encountered for your own consideration.


    (Note:  This is what works for me.  Consult your physician and/or do your own research if you are unsure of the effects of any of these oils; as some essential oils may cause allergic reactions.  Remember, Everything in moderation!!!)

    Hope you find benefit in some bit of this information. 

    Side Note: My Hair Journey resulted in my hair growing thicker and from ear length to past my shoulders in 12 months.

    Grace and Peace.

    My Nail Regimen...Soup to nuts!

    Well I have been blogging about nails for a few months now and I briefly described my nail regimen at the start. Most things have remained the same but a few have changed so I decided to document my official (for the moment) nail regimen.  As the name of my blog states, “For me, It works”.  I hope it will work for you also.  Again, I don’t claim to be a professional, I just know what works for me.

    I change my polish approximately twice a week but I only do a full manicure-cuticles, shaping, and all about once every 1-2 weeks.  I will explain why later.

    My Regimen:

    Tools for a Manicure
    1. First, remove all traces of old polish.  I know that many have a heartfelt philosophy regarding Acetone or non-Acetone.  Personally, unless I am wearing acrylics or patches, I use Acetone.  Because I moisturize several times throughout the day, I am not worried about drying out my nails or cuticles.  I use whichever strengthening/nourishing polish remover I find on sale.  IMO, they all work pretty much the same.  I purchased a remover pump bottle from Sally Beauty Supply to help handle the remover. 
    2. If time allows, my next step is to soak my nails in warm water.  In the water I add a denture whitening tablet, and some Vitamin E oil.  I allow my nails to soak at least 5 minutes.  This helps to soften the cuticles as well as whiten my nails.
    3. After I have soaked my nails, I dry my hands and apply a cuticle remover.  Here is another area where I don’t have a steadfast staple product.  I rotate between Lemon Brite Varoom Creamy Cuticle Remover, True Blue Spa Disappearing Acts Cuticle Remover (discontinued) and Develop 10 Creamy Cuticle Remover.  Each of these works as they should to remove my cuticles.  I use either an orangewood stick or a cuticle pusher to remove any cuticle buildup.  If by chance I have any hangnails I use my cuticle nippers; never pulling any hangnails. 
    4. If I am in need of a trim, I use a nail clipper and/or my Essie Crystal Nail File (LOVE IT!!!)  Once I have trimmed back my nails, I buff and shape my nails using a Crystal File and a buffer block.  This is to make sure there are no snags or ridges.  Buffing the nails helps to remove ridges but you must be careful not to over buff as this can thin the nail.  Crystal files help to seal the free edge of your nail unlike the old school emery boards. 
    5. By this point my hands and nails are usually dry and covered in dust.  I take this opportunity to oil my cuticles and give my hands a good exfoliation.  I use whichever body/hand scrub I have nearby.
    6. There are several premade cuticle oils on the market; some of which I have tried.  But after some research, I decided to make my own.  I mix Jojoba Oil, Sweet Almond Oil, Vitamin E Oil, and Lemon Essential Oil for fragrance.  After the exfoliation, my hands are soft and refreshed.  I follow this step with a good hand crème.
    7. My favorites are Gold Bond Ultimate with Shea Butter and True Blue Spa-look ma, new hands with Paraffin.
    8. Each night before bed, I apply cuticle crème/balm and my cuticle oil.  My favorite balm, which of course has been discontinued is True Blue Spa Cuticle Treatment with 59% Shea Butter.  My other option is Orly Cuticle Therapy Crème.  I apply the balm/crème directly to my cuticle, and a apply the oil to my nails-tops and underside.  I try to apply the oil at least twice a day-morning and night.  The key is to keep you nails moisturized.
    Steps to Chip-free Polish
    9. If I intend to polish my nails, which is most of the time, there are steps to take also.  With these steps that I follow with every polish change, I very seldom have problems with chipping, peeling, or stained nails. 
    10.First, it is imperative that all traces of oil are removed from the nail bed.  So I take a cotton ball, dipped in alcohol and wipe down each nail, including the free edge.  Next are the products and steps I take when applying nail polish:
    a. Nail Treatment:  I apply 1 coat of either Nail Tek Xtra or Nail Life Nail Revitalizer
    b. Nail Strengthener: I apply 1 coat of Gelous Advance Nail Gel Coat
    c. Adhesive Base Coat: I apply 1 coat of Nail Life Gripper
    d. RidgeFilling Base Coat: If needed, which is not often, Orly Ridgefiller base coat.
    e. 2-3 coats of nail polish
    f.  Top Coat: 1 coat of Seche Vite’ Fast Dry Top Coat
    11. Again, I realize that this seems like a long process but I only do a full manicure approximately every 1-2 weeks.  Following these steps has helped me to keep my nails strong and healthy.

    It's not just about the outside...

    12. Outside of the manicure process and in conjunction with my healthy hair journey, I also take supplements and drink plenty of water.
    Again, this is what works for me.  If by chance some of this works for you, Great!!! 

    Grace and Peace.

    NOTD: China Glaze-Stella & Nail Progress Update

    Happy Friday!!!  First, I started this mani by removing 9 layers of polish using the foil method. If you haven’t tried this polish removal method, it really does work.  Give it a try, especially with glitter polish.  I started my regular nail regimen in early December, 2010.  So looking back to my first blog through today, I see a fair amount of growth.  I have continued with the same regimen that I noted in my first blog.  The biggest issue I have had during this time is deciding on nail polish colors. LOL!!! In the past, I stuck with the reds and berries.  I have since ventured out to the more fashion forward shades of blues, greens, purples, and blacks; which I am loving!

    China Glaze - Stella
    So for my NOTD, I have had at least 5 bottles sitting on my desk for the last week: all varying shades of purple.  So what did I decide on?  Thanks to RMCANDLELIGHT of Nails Beautiqued, China Glaze - Stella won out. Stella is a beautiful violet purple shimmer with more red than China Glaze - Let's Groove, which is a more blue purple, but still in my inventory to be worn at a later date.  It also appears to be in the  same family as ChG Cowgirl Up, maybe someone can do a comparison. So I will be sporting Stella for a while. It is so pretty!  But be on the lookout, I am expecting my latest order from Trans Design either today or Monday...yippee, more toys!

    How to get long nails ?

    This is not me, but since it is very close to my regimen, I decided to share it.

    Start of my Nail Journey...

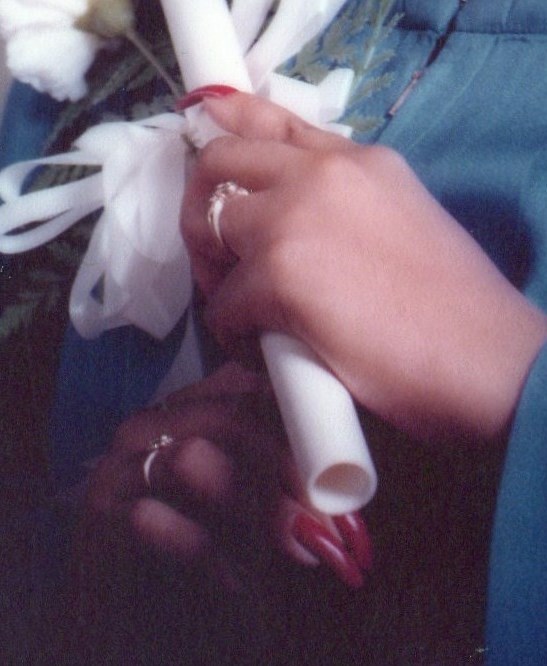
    With Christmas fast approaching and all the hustle and bustle of the season, I have really been neglecting my nails. So the first entry to my new Beauty blog will be about my nail regimen. I am fortunate that because of my genes, if I take some care, my nails don’t have any trouble growing to extremely long lengths (equivalent to a 5-6 on a Tami Taylor nail form). My mother’s nails have always been long and strong. So last night I sat down and gave myself a manicure and will continue to document my progress with pictures included. I found my high school graduation picture (25 yr+ ago) and you can see from that picture that I had long natural nails.

    My regimen may seem a bit extensive, but again, as the name suggests, “For me, it works.”

    Nail Regimen (approximately every 2 weeks or as needed)-Updated on 1/6/2011:
    • Soak nails in warm soapy water to soften cuticles
    • Apply cuticle remover, and let sit for 4-5 minutes
    • Push back cuticles, being careful to clip, not pull any imperfections
    • Buff and shape nails using buffer and crystal file.
         o Buffing the nails, helps remove ridges, but be careful not to over buff, it could thin the nail
         o Crystal files seal the edges of your nails whereas the old school emery boards leaves the edges raged and prone to tearing
    • Oil cuticles; do a quick hand scrub/exfoliate
    • Careful to remove excess oils from nail beds
         o Oils on the nail beds, prevent polishes from adhering to the nail bed
    • Apply 2 coats of Nail treatment (Nail Life), let dry - Available at Sally Beauty
    • If applying polish, apply Base Coat (Gripper), let dry - Available at Sally Beauty
         o Base Coats help prevent deeper/darker polishes from staining your nail beds
    • Apply two coats of polish, let dry about 4-5 minutes
    • Apply top coat, let dry about 4-5 minutes
    • Apply Nail dryer - Seche Vite Fast Top Coat, my new love. Drys my nails super fast!
    • Nightly, before bed, apply cuticle cream/oil and hand lotion
         o Cuticle cream helps to maintain soft cuticles
         o For Cuticle Oil, I mix my own, Jojoba, Almond, & Vitamin E oils, mixed with Peppermint & Lemon Essential oils
         o The nightly massage helps with the circulation of blood and increases growth
    a comic strip!